TOC
Goal
Allow users to signup to our React Native application using Google or Microsoft. When a user signs up a user account should be created or updated on our Django Application.
Overview
In Part 1, we’ll setup Django to support social authentication via Google and Microsoft.
In Part 2, we’ll connect our React Native app to Google and Microsoft SSO and our Django API.
Prerequisites
- you have already create a Django App using Django Rest Framework
- you have a React Native App built on Expo
Part 1: Django
1.1 Install Packages
| Package | Django App Name | Documentation |
|---|---|---|
social-auth-app-django | social_django | https://python-social-auth.readthedocs.io/en/latest/configuration/django.html |
django-oauth-toolkit | oauth2_provider | https://github.com/jazzband/django-oauth-toolkit |
drf_social_oauth2 | drf_social_oauth2 | https://drf-social-oauth2.readthedocs.io/en/latest/installation.html |
Your INSTALLED_APPS should now have the following Installed Apps:
INSTALLED_APPS = [ ... "oauth2_provider", "social_django", "drf_social_oauth2", ...]1.2 Create API Client
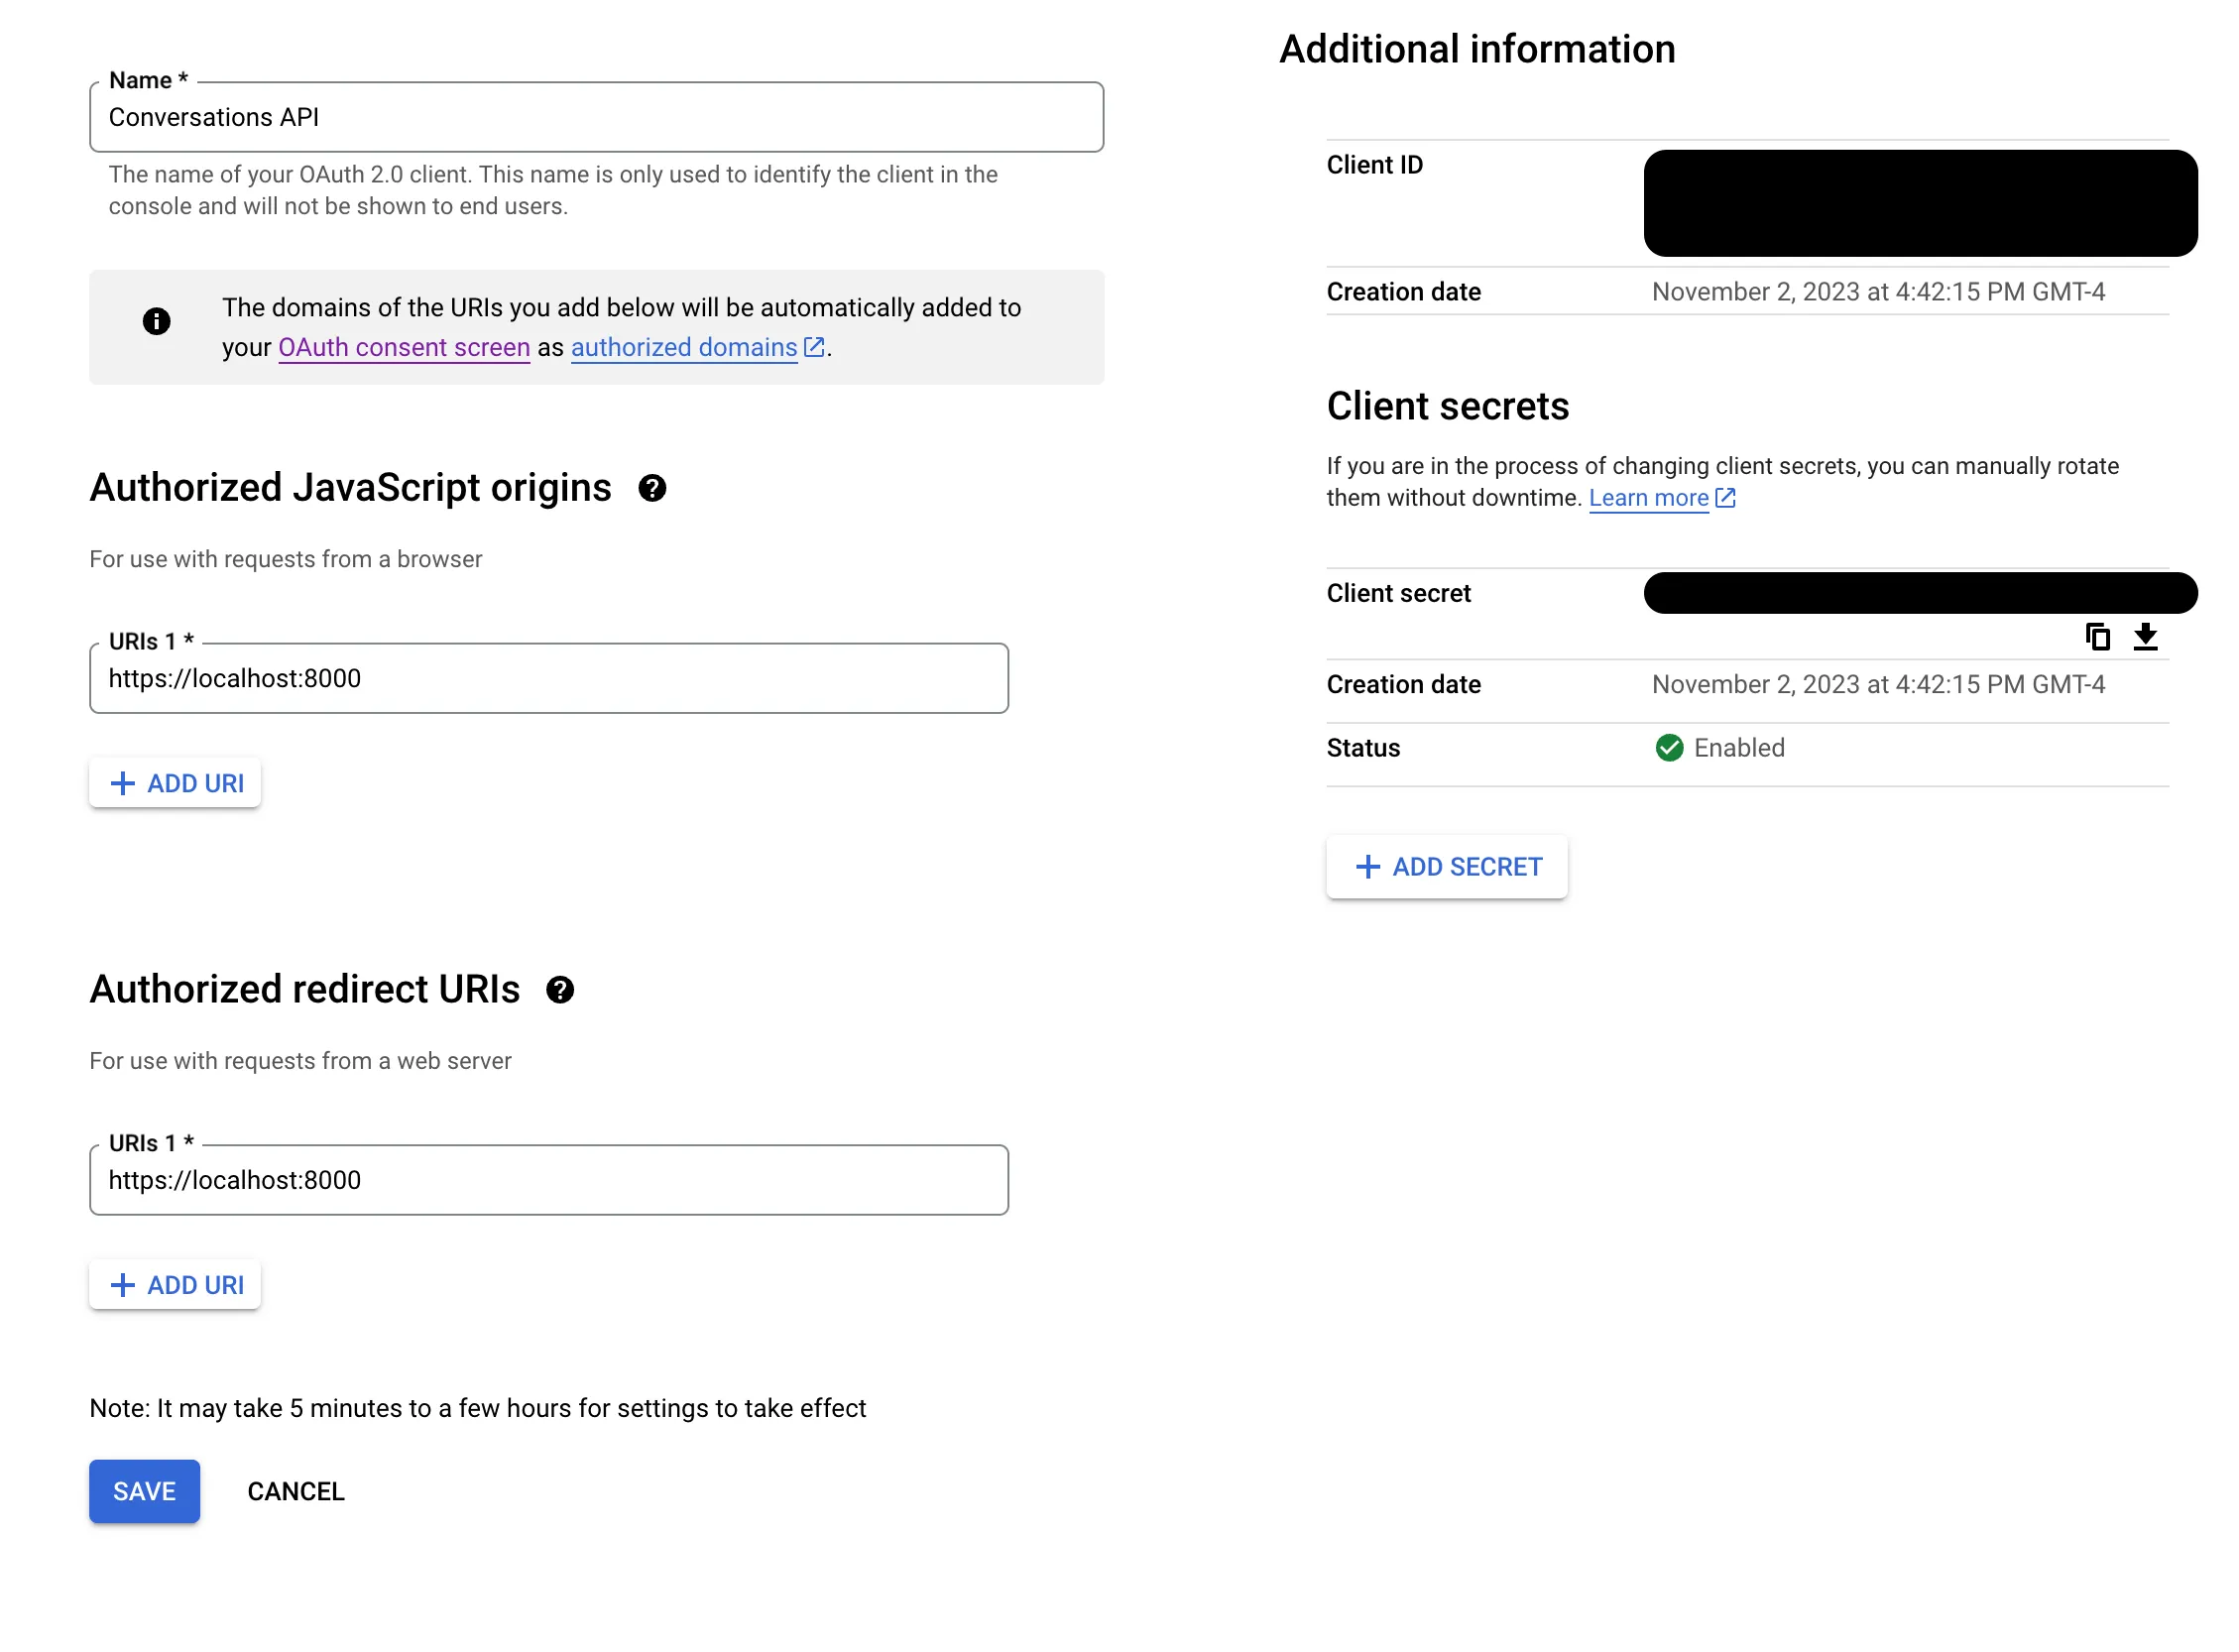
Follow the DRF Social Oauth Guide to “Setup a New Application” (linked below).
IMPORTANT
Copy & Save Client secret
Before you hit “Save” copy the Client Secret and Client ID and store them in a safe place. You’ll need them later on, and the Client Secret is hashed on save so you’ll be unable to copy it later.
Setting Up a New Application — drf-social-oauth2 2.1.3 documentation
1.3 Update Social Auth Settings
In settings.py add the following options:
ACTIVATE_JWT = TrueSOCIAL_AUTH_JSONFIELD_ENABLED = TrueSOCIAL_AUTH_USERNAME_IS_FULL_EMAIL = True-
ACTIVATE_JWTAccess and refresh tokens will be JWTed
https://drf-social-oauth2.readthedocs.io/en/latest/installation.html#installation
-
SOCIAL_AUTH_JSONFIELD_ENABLEDWhen using PostgreSQL, it’s recommended to use the built-in JSONB field to store the extracted
extra_data.https://python-social-auth.readthedocs.io/en/latest/configuration/django.html#json-field-support
-
SOCIAL_AUTH_USERNAME_IS_FULL_EMAILIf you want to use the full email address as the
username, define this setting.https://python-social-auth.readthedocs.io/en/latest/configuration/settings.html#username-generation
1.4 Setup Google OAuth in Django
1.4.1 Create Application
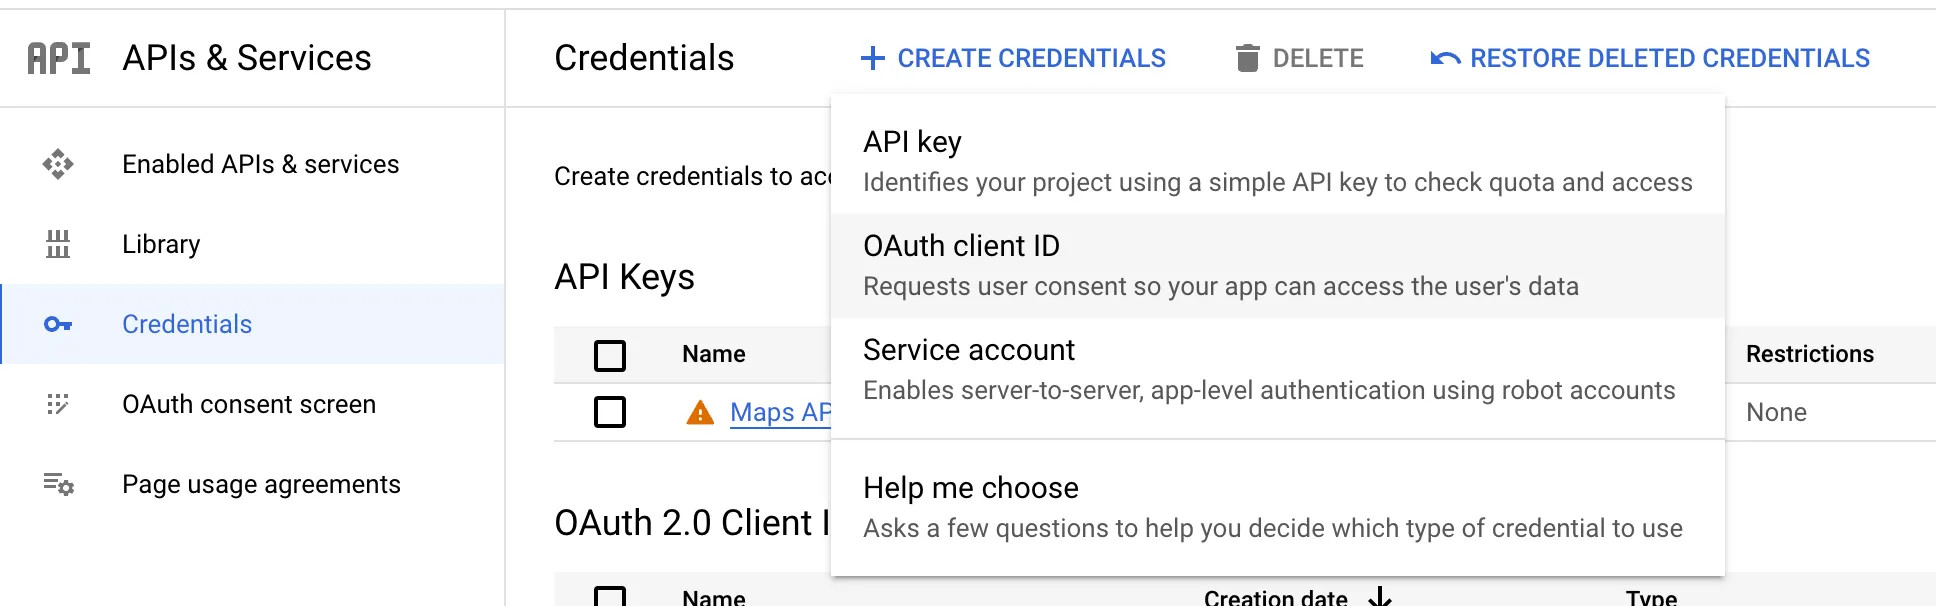
- In Google Cloud Console, select your project and go to: APIs & Services → Credentials → Create Credentials → OAuth client ID
- Fill in the following settings:
- Application type: Web application
- Name: API
- Authorized Javascript origins:
https://localhost:<port><your_prod_domain>
- Authorized redirect URIs:
- (The same as Authorized Javascript origins)
1.4.2 Update Django Settings
Follow the guide here to add support for Google OAuth:
Integration Social Backends — drf-social-oauth2 2.1.3 documentation
SOCIAL_AUTH_GOOGLE_OAUTH2_KEYvalue is theClient IDof the OAuth2 credential created on Google Cloud ConsoleSOCIAL_AUTH_GOOGLE_OAUTH2_SECRETvalue is theClient Secretof the OAuth2 credential created on Google Cloud Console
1.5 Setup Microsoft OAuth in Django
The settings for Microsoft OAuth are more complicated than setting up for Google. Setup requires overriding one of the serializers (and subsequently a view) provided by DRF Social Auth in order to change a serializer. There may be a better method to do this, but this is what worked for me.
1.5.1 Create Application
Base Application Setup
- In Microsoft Entra create a new Application
- Enter the following settings:
- Name:
<app_name> - Supported account types: Select which types of accounts should be allowed to sign in.
- Name:
- Click Register
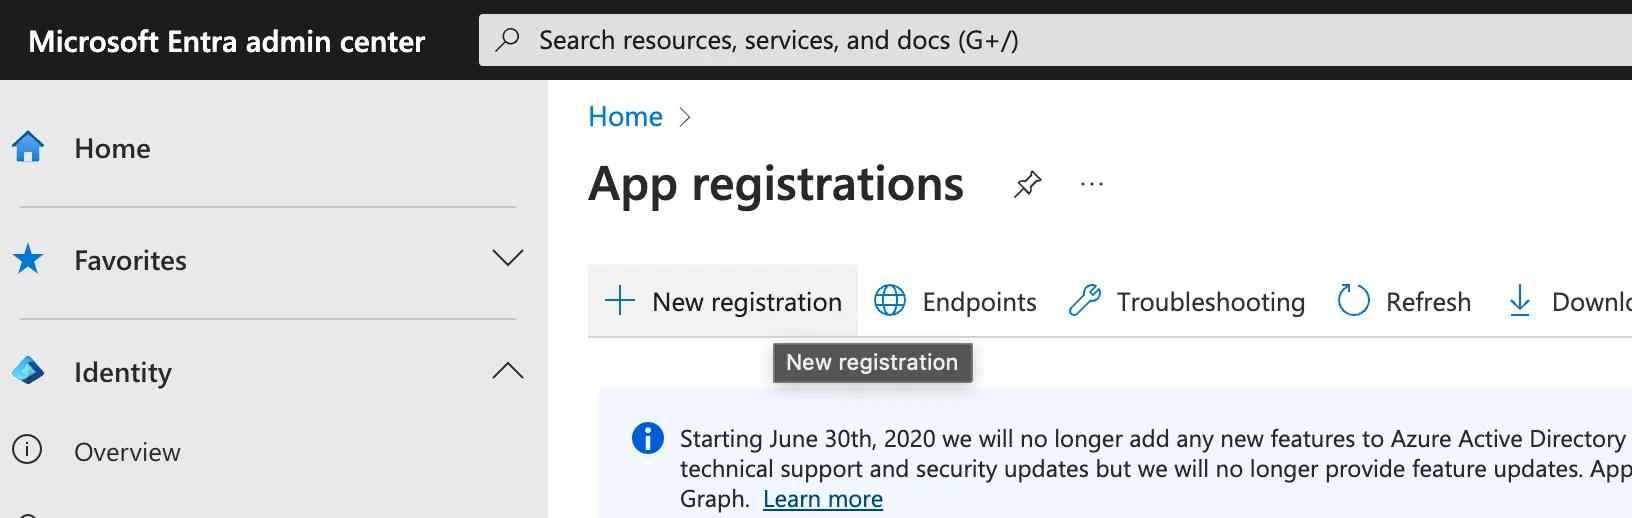
App Registration > New Application
App Registration Page
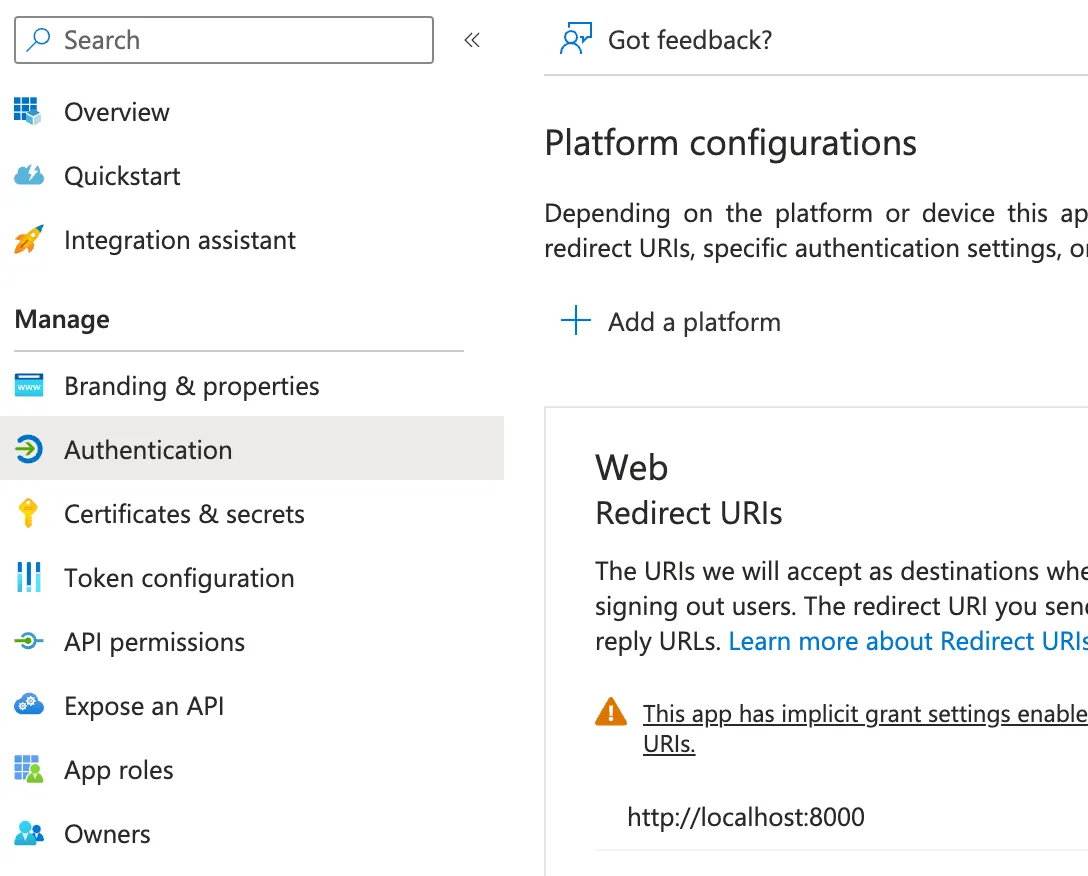
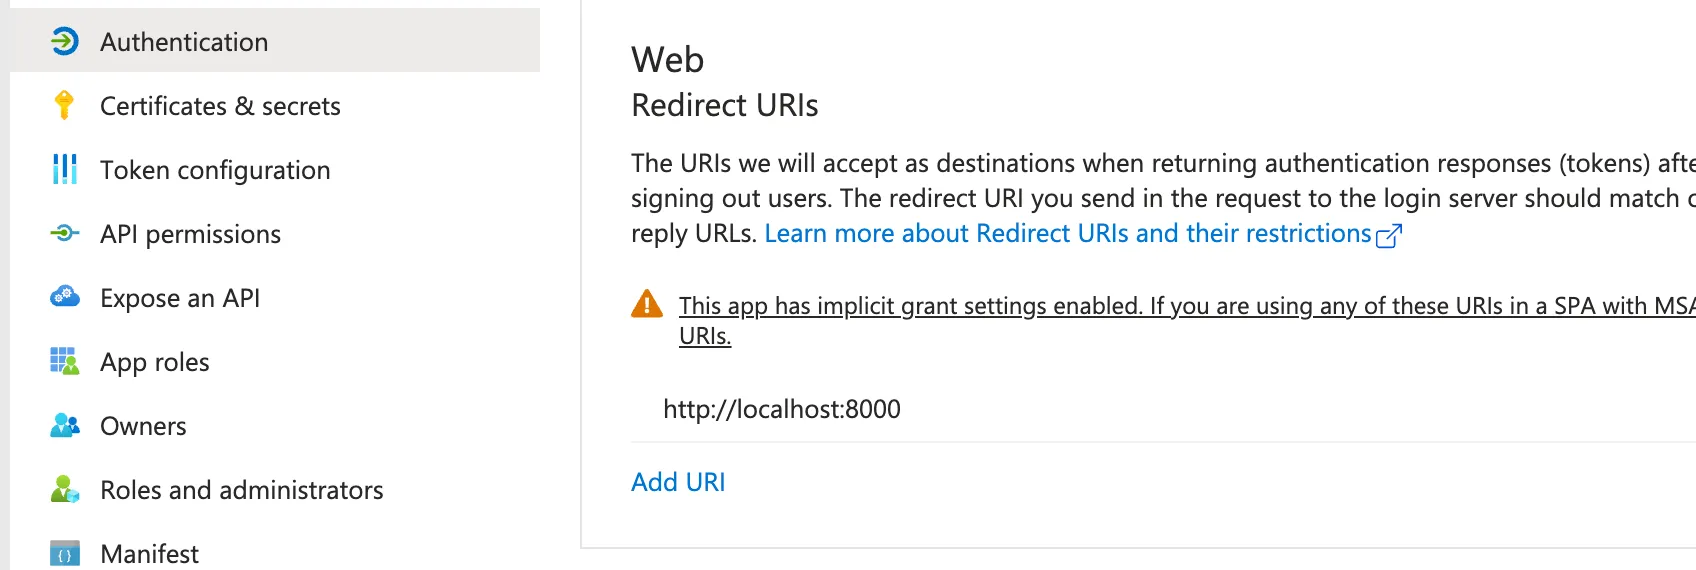
Update Settings
- Navigate to: Authentication > Add a platform
- Select Web
- Enter your Django server hosts (eg.
http://localhost:8000)
- Under Implicit grant and hybrid flows enable both
Access tokensandID tokens - Under Advanced settings enable
Allow public client flows - Save
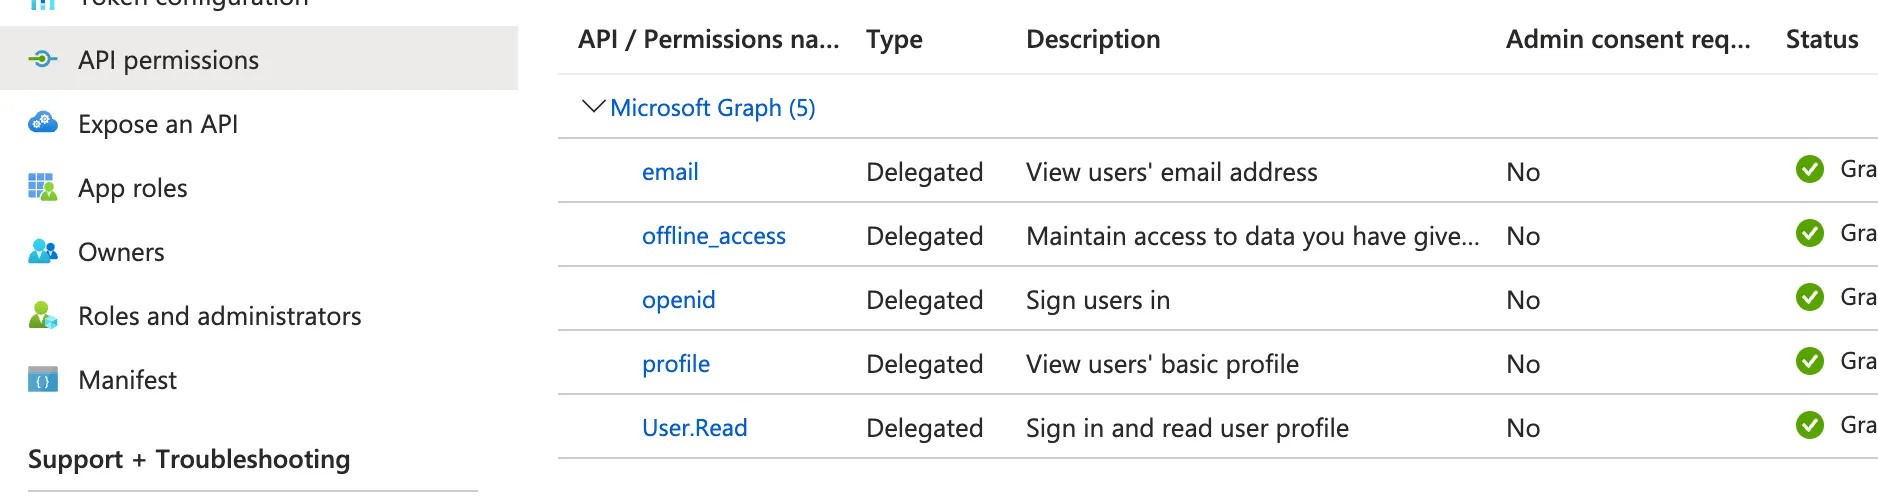
Update Permissions
- Navigate to: API permissions
- Ensure you have the following permissions on Microsoft Graph:
emailoffline_accessopenidprofileUser.Read
1.5.2 Update Django Settings
In settings.py add social_core.backends.microsoft.MicrosoftOAuth2 to your AUTHENTICATION_BACKENDS
AUTHENTICATION_BACKENDS = ( "social_core.backends.google.GoogleOAuth2", **"social_core.backends.microsoft.MicrosoftOAuth2",** "drf_social_oauth2.backends.DjangoOAuth2", "django.contrib.auth.backends.ModelBackend",)This backend uses https://graph.microsoft.com/v1.0/me to fetch the user data given a access_token.
1.5.3 Fix Access Token Max Characters Error
By default the drf_social_oauth2 ConvertTokenSerializer limits a token to 2000 characters.
This is bad for Microsoft OAuth, as it returns a token larger than 2000 characters. In order to prevent an error later on, let’s update the ConvertTokenSerializer now.
Override ConvertTokenSerializer
In my case, I have an app called authentication in my project, which houses views and models related to auth (eg. my custom User model). Update your app views.py to have the following:
from rest_framework import serializersfrom drf_social_oauth2.serializers import ConvertTokenSerializer as BaseConvertTokenSerializerfrom drf_social_oauth2.views import ConvertTokenView as BaseConvertTokenView
**class ConvertTokenSerializer(BaseConvertTokenSerializer):    token = serializers.CharField(max_length=3000)**
class ConvertTokenView(BaseConvertTokenView):    def post(self, request: Request, *args, **kwargs):        **serializer = ConvertTokenSerializer(data=request.data)**        serializer.is_valid(raise_exception=True)        # Use the rest framework `.data` to fake the post body of the django request.        request._request.POST = request._request.POST.copy()        for key, value in serializer.validated_data.items():            request._request.POST[key] = value
        try:            url, headers, body, status = self.create_token_response(request._request)        except InvalidClientError:            return Response(                data={'invalid_client': 'Missing client type.'},                status=HTTP_400_BAD_REQUEST,            )        except MissingClientIdError as ex:            return Response(                data={'invalid_request': ex.description},                status=HTTP_400_BAD_REQUEST,            )        except InvalidRequestError as ex:            return Response(                data={'invalid_request': ex.description},                status=HTTP_400_BAD_REQUEST,            )        except UnsupportedGrantTypeError:            return Response(                data={'unsupported_grant_type': 'Missing grant type.'},                status=HTTP_400_BAD_REQUEST,            )        except AccessDeniedError:            return Response(                {'access_denied': f'The token you provided is invalid or expired.'},                status=HTTP_400_BAD_REQUEST,            )
        return Response(data=json_loads(body), status=status)
Update your application urls.py
from django.urls import include, re_pathfrom oauth2_provider.views import AuthorizationViewfrom drf_social_oauth2.views import (    TokenView,    RevokeTokenView,    InvalidateSessions,    InvalidateRefreshTokens,)from .views import ConvertTokenView
auth_urlpatterns = (    [        re_path(r'^authorize/?$', AuthorizationView.as_view(), name='authorize'),        re_path(r'^token/?$', TokenView.as_view(), name='token'),        re_path(r'^convert-token/?$', ConvertTokenView.as_view(), name='convert_token'),        re_path(r'^revoke-token/?$', RevokeTokenView.as_view(), name='revoke_token'),        re_path(            r'^invalidate-sessions/?$',            InvalidateSessions.as_view(),            name='invalidate_sessions',        ),        re_path(            r'^invalidate-refresh-tokens/?$',            InvalidateRefreshTokens.as_view(),            name='invalidate_refresh_tokens',        ),        re_path('', include('social_django.urls', namespace='social')),    ],    "drf",)
Update your project urls.py
import authentication.urlsurlpatterns = [ ... re_path(r"^auth/", include(authentication.urls.auth_urlpatterns)),]IMPORTANT
🎉 Whew 😮💨😌 you’ve completed Part 1! You now have a Django API capable of authenticating users via Google and Microsoft. Next up: In Part 2 we setup your React Native App to connect with the Django backend and Google/Microsoft SSO
Part 2: React Native
2.1 Install Packages
Install Expo AuthSession
Install Expo Web Browser
Install axios
2.2 Warm Web Browser & Setup State
import * as React from 'react';import axios from "axios";import * as WebBrowser from 'expo-web-browser';import { Button, Text, SafeAreaView, Platform } from 'react-native';
WebBrowser.maybeCompleteAuthSession();
export default function App() {  // We store the JWT in here  const [token, setToken] = React.useState<string | null>(null);
  React.useEffect(() => {    if (Platform.OS === "web") {      return;    }
    WebBrowser.warmUpAsync();
    return () => {      if (Platform.OS === "web") {        return;      }
      WebBrowser.coolDownAsync();    };  }, []);
  return (    <SafeAreaView>      <Text>{token}</Text>    </SafeAreaView>  );}
2.3 Setup Google OAuth in React Native
2.3.1 Update Google Cloud Console
Navigate to APIs & Services > Credentials, and create three new OAuth Clients with the following Application Types and settings:
- iOS
- Set Bundle Id to the value defined in
app.jsonios.bundleIdentifier
- Set Bundle Id to the value defined in
- Android
- Web
- Set Authorized Redirect URLs to your react native web hosts:
2.3.2 Connect Google OAuth
Update Imports
import * as Google from "expo-auth-session/providers/google";Add Google OAuth Support
For clientId, iosClientId, and androidClientId, use the Clients IDs from the OAuth Clients you created above.
export default function App() { const [, googleResponse, googlePromptAsync] = Google.useAuthRequest({ clientId: GOOGLE_AUTH_CLIENT_ID_WEB, iosClientId: GOOGLE_AUTH_CLIENT_ID_IOS, androidClientId: GOOGLE_AUTH_CLIENT_ID_ANDROID, }); ...}Connect a Button to the Google OAuth Prompt
Update your template to include a button to trigger the Google Prompt
return ( <SafeAreaView> <Button title="Continue with Google" onPress={googlePromptAsync} /> <Text>{token}</Text> </SafeAreaView>);Handle Google Auth Complete
When the Google Prompt is successful, get the access_tokenreturned by Google, and send it to our Django API backend to convert to a Django Social Auth access_token
For DJANGO_API_CLIENT_ID and DJANGO_API_CLIENT_SECRET use the values you copied earlier when you Created the Social Auth API Client (see: 1.2 Create API Client)
Save the token returned by the Django API, this token can be used later on as an Authorization header on axios.
export default function App() { ... useEffect(() => {   if (googleResponse?.type !== "success") {     return;   }
   axios   .post(    "<django-api-host>/auth/convert-token/",       {         grant_type: "convert_token",         backend: "google-oauth2",         client_id: DJANGO_API_CLIENT_ID,         client_secret: DJANGO_API_CLIENT_SECRET,         token: googleResponse.params.access_token,       },       {         headers: { Accept: "application/json" },       },    )   .then((djangoAPIResponse) => {    setToken(djangoAPIResponse.data.access_token)   }); }, [googleResponse]);}
2.4 Setup Microsoft OAuth in React Native
2.4.1 Update Application in Microsoft Entra Admin Center
Return to the Microsoft Entra Admin Center, and update the Application you created earlier.
Under the Authentication section add new redirect urls for:
Single-page application- Add urls for your react native web application (eg. http://localhost:8081/)
Mobile and desktop applications- Add redirect urls for your react native ios and android apps using your app scheme (eg. app_scheme://)
- You can find your
app_schemeinapp.json>schemefield.
2.4.2 Connect Microsoft OAuth
Update Imports
import { exchangeCodeAsync, makeRedirectUri, useAuthRequest, useAutoDiscovery,} from 'expo-auth-session';Add Microsoft OAuth Support
- Set
MICROSOFT_TENANT_IDuse your Microsoft Tenant ID orcommon - Set
MICROSOFT_AUTH_CLIENT_IDto your Application Client ID- In the Microsoft Entra Admin Center: Select your Application > Overview > Essentials >
Application (client) ID
- In the Microsoft Entra Admin Center: Select your Application > Overview > Essentials >
export default function App() { ... const microsoftDiscovery = useAutoDiscovery( `https://login.microsoftonline.com/${MICROSOFT_TENANT_ID}/v2.0`, ); const microsoftRedirectUri = makeRedirectUri({ scheme: undefined, path: "auth", }); const [microsoftRequest, microsoftResponse, microsoftPromptAsync] = useAuthRequest( { clientId: MICROSOFT_AUTH_CLIENT_ID, scopes: ["openid", "profile", "email", "offline_access"], redirectUri: microsoftRedirectUri, }, microsoftDiscovery, ); ...}Connect a Button to the Google OAuth Prompt
Update your template to include a button to trigger the Google Prompt
return ( <SafeAreaView> <Button title="Continue with Google" onPress={googlePromptAsync} /> <Button title="Continue with Microsoft" onPress={microsoftPromptAsync} /> <Text>{token}</Text> </SafeAreaView>);Handle Microsoft Auth Complete
For Microsoft auth, we need to convert the code returned to an access token, and then pass that token along to our Django API.
As with Google Auth, for DJANGO_API_CLIENT_ID and DJANGO_API_CLIENT_SECRET use the values you copied earlier when you Created the Social Auth API Client (see: 1.2 Create API Client)
Save the access_token returned by the Django API in a state (or store), this token can be used later on as an Authorization header on axios.
export default function App() { ... useEffect(() => {    if (      !microsoftRequest ||      !microsoftDiscovery ||      microsoftResponse?.type !== "success"    ) {      return;    }
  exchangeCodeAsync(      {        clientId: Config.MICROSOFT_AUTH_CLIENT_ID,        code: microsoftResponse.params.code,        extraParams: microsoftRequest.codeVerifier          ? { code_verifier: microsoftRequest.codeVerifier }          : undefined,        redirectUri: microsoftRedirectUri,      },      microsoftDiscovery,    ).then((microsoftExchangeRes) => {   axios    .post(     "<django-api-host>/auth/convert-token/",        {          grant_type: "convert_token",          backend: "microsoft-graph",          client_id: DJANGO_API_CLIENT_ID,          client_secret: DJANGO_API_CLIENT_SECRET,          token: microsoftExchangeRes.accessToken,        },        {          headers: { Accept: "application/json" },        },     )    .then((djangoAPIResponse) => {     setToken(djangoAPIResponse.data.access_token)    });    });  }, [microsoftResponse]);}